There are two ways to create a Lora device:
- Created by the APP
- Manual creation
- Import via template
First of all, you need to configure the LoRa gateway for network access.
Configure LoRa Gateway(MGKW2)
If you are using the MOKO MKGW2 gateway, you need to configure the gateway to access the network and connect to the MOKO Chirpstack first. The configuration steps are as follows:
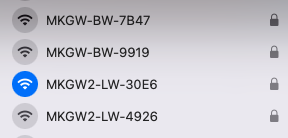
1 Connect to WiFi and open the Web configuration page
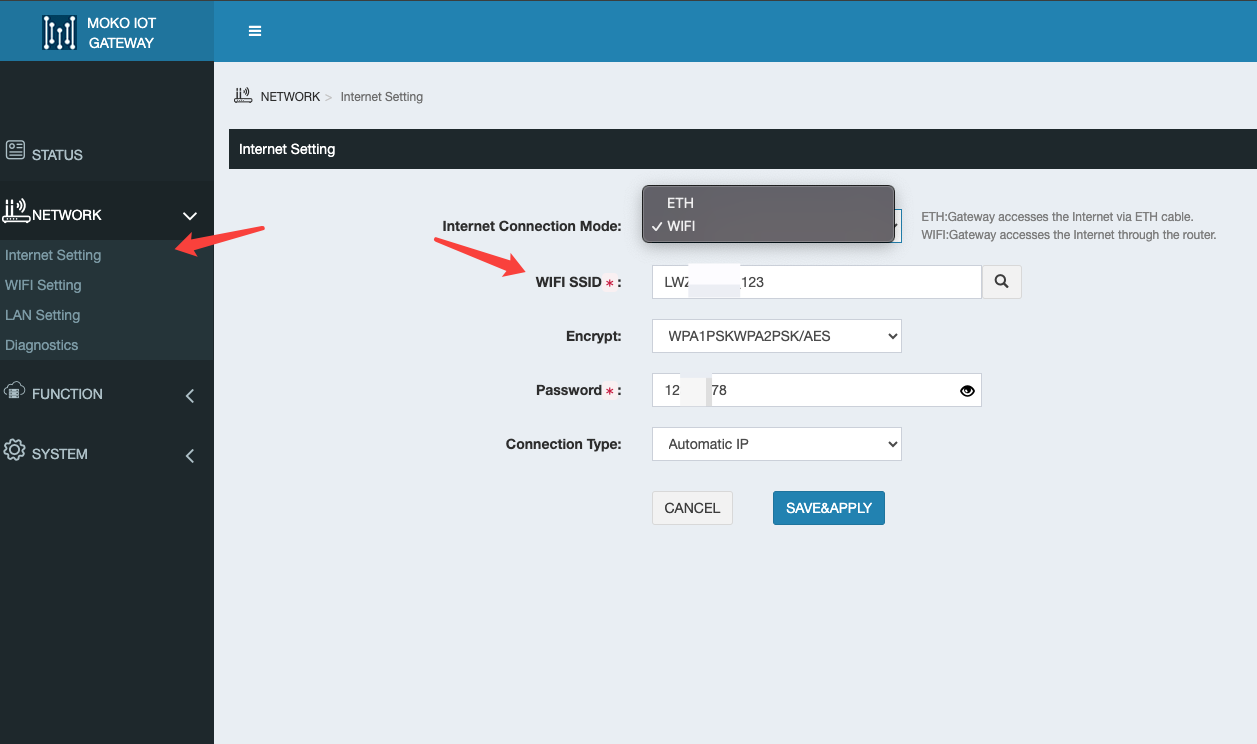
2 Configure the gateway for network access
3 Configure the gateway connection to MOKO Chirpstack server
Chirpstack server ip is 101.37.81.143
EU868 port is 1700
US915-0 port is 1701
US915-1 port is 1702
AS923 port is 1703
AU915-0 port is 1704
AS915-1 port is 1705
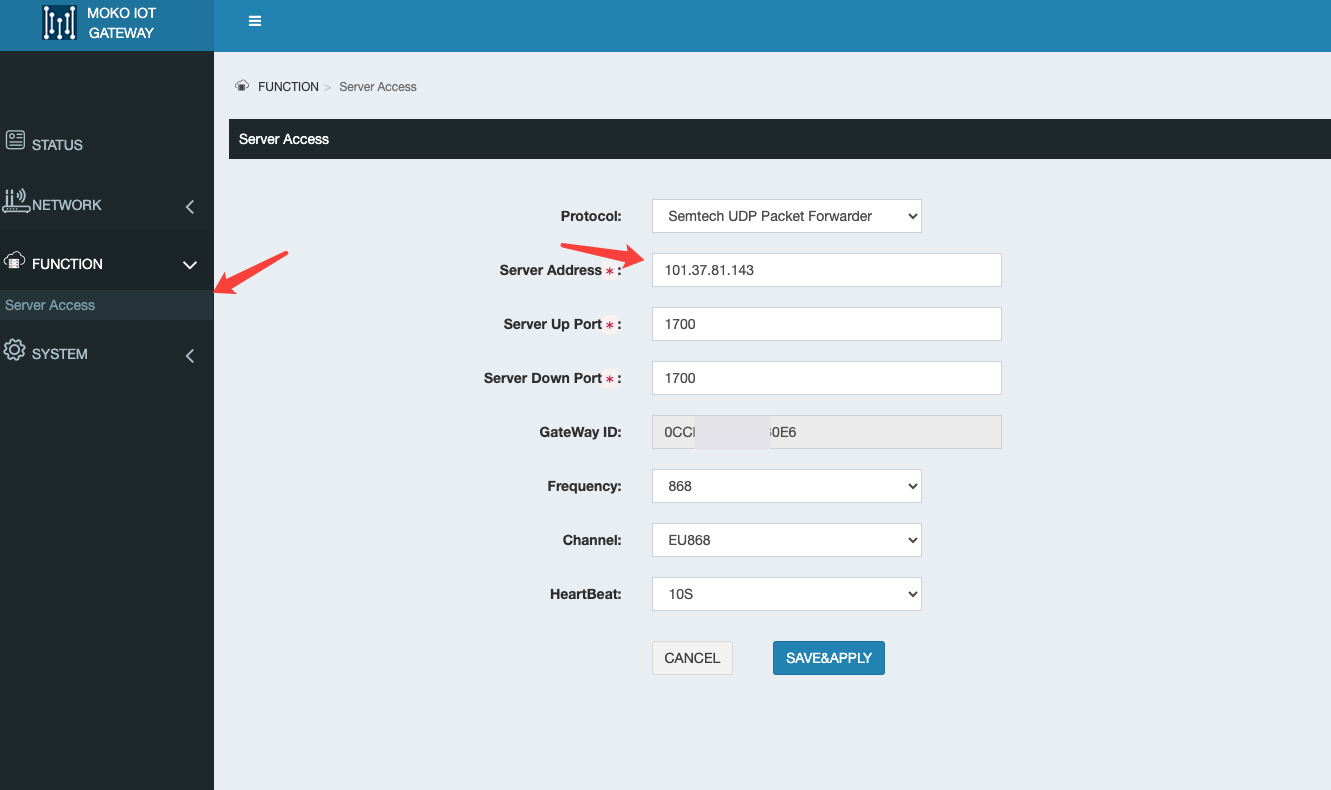
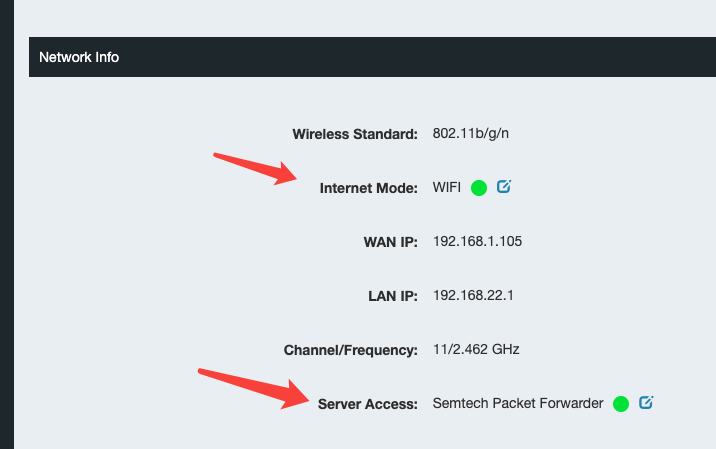
4 Check the connection status of the gateway
Created by the APP
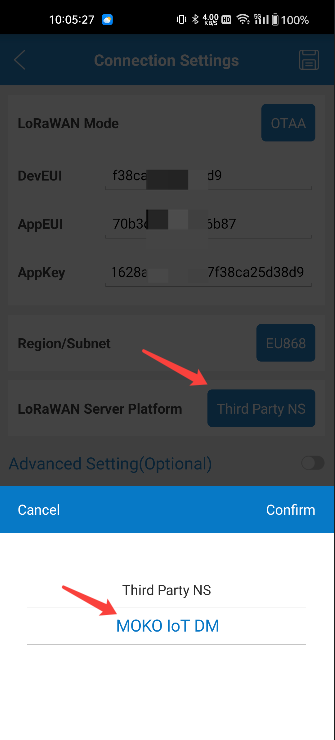
When configuring network access parameters through the MKLoRa APP, select “MOKO IoT DM” for the LoRaWAN server platform. After selection, DevEUI cannot be modified, and the Region needs to be consistent with the gateway
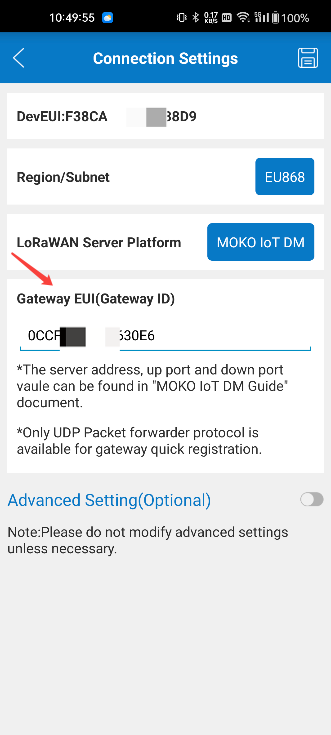
If it is the first time to add a Gateway, you need to enter the Gateway ID(In Server Access on the gateway web configuration page)
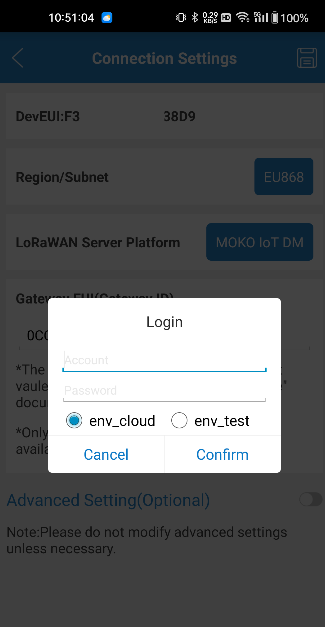
Click the Save button, enter the username and password. The platform will create the device simultaneously on MOKO Chirpstack and MOKO IoT DM, and set the parameters to the device at the same time. After the configuration is successful, the device will disconnect for a while
After successful synchronization, click the “Search” button to refresh. You will see that the device has been created successfully.
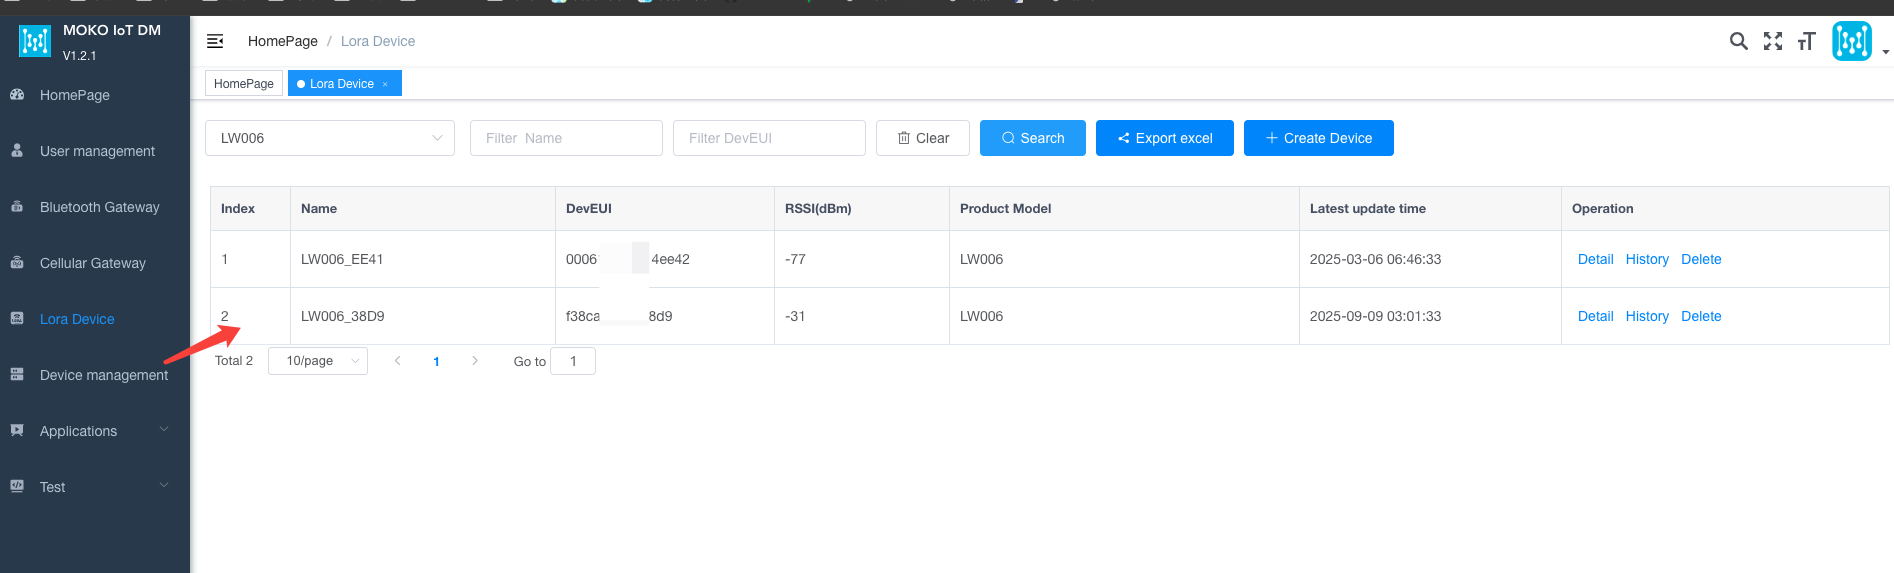
Manual creation
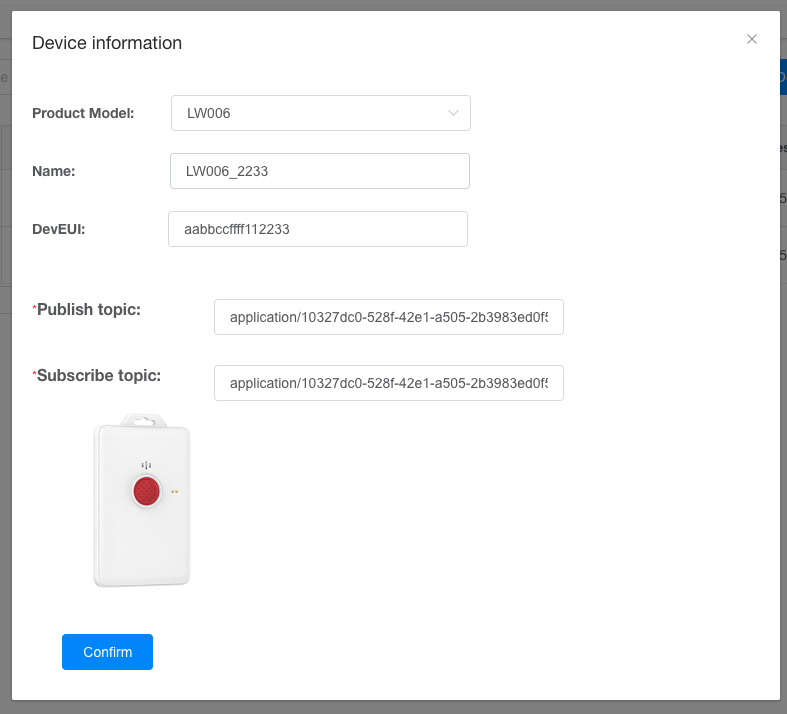
To manually create a device, you need to select the correct device model, fill in the DevEUI (note to use lowercase), and the publish/subscribe subject of the device.
The theme format is
Publish subject: application/{application id}/device/{DevEUI}/event/up
Subscribe to the topic: application/{application id}/device/{DevEUI}/command/down
application id:
LW001-BG:a135ac92-1702-4aef-b8f5-d4fbd3b04fe9
LW003V3:c42e7d47-bb92-41a3-bff9-7e6fa3e5100a
LW004-PB:ef73037a-2b4f-457c-9690-cfbc2000839d
LW005-MP:8d2b8636-dd70-4648-8acf-b7f42caa1f27
LW006-SB:10327dc0-528f-42e1-a505-2b3983ed0f53
LW007-PIR:3bf56fd1-95c8-4ec3-a644-8b1b66d66bef
LW008-MT:b2db6c0d-0722-47af-b010-ef2139ed7178
LW009-SM:a13dcdf5-29a6-4a5d-8028-16fdb392c9b2
LW008-MTE/PTE/LW001-BGE:069f863a-3654-4bdc-b1db-2af3c7cdcc24
LW010_CT:1e39e569-2e8b-457a-827e-1446a3f403cd
LW011-MT:6fd2fa89-f325-4c43-958f-3b883688d113
LW012_CT:7a26e280-7df5-4b75-819c-fba204817822
LW013_SB:e9cef7d9-58be-49b1-8c09-9571b8c785db
An example is as follows:
Import via template
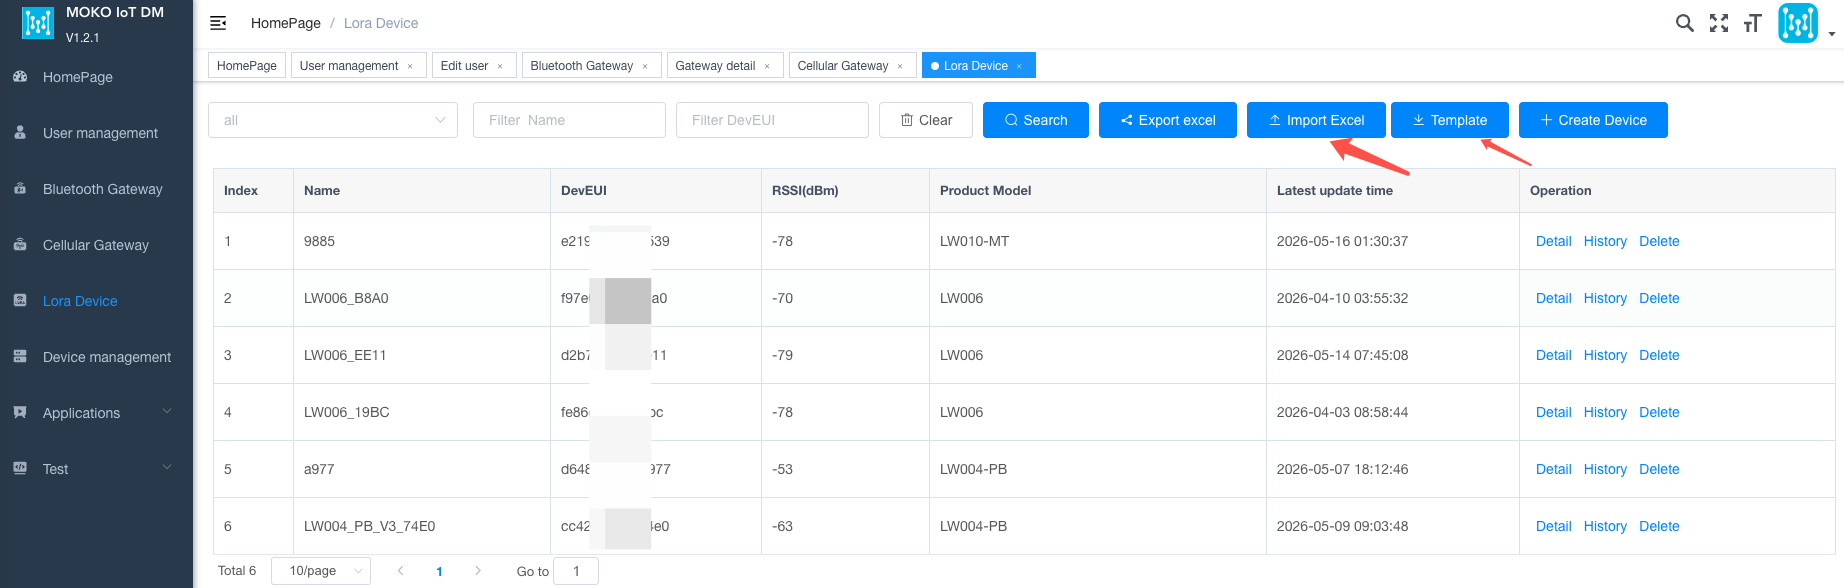
On the list page, click the “Template” button to download the template file for import. Enter the device information and click “Import Excel” to complete the import process.
An example is as follows:

Last editor:admin Update time:2026-06-12 09:12